【経歴/受賞歴】 2024年 Bond University MBA取得 2023年 Ponotech Inc. CEO 2020-2021年 数億円のM&Aの売り手側を担当 2019-2023年 ソフトウェア開発企業にて受託開発のリーダーを務める 2018年 半導体製造装置の量産化対応を担当 2013-2016年 海外向けプレス機械の制御設計として活躍
ComfyUI Community Gathers in Shibuya for First-Ever Meetup: Shaping the Future of Image Generation AI
ComfyUI, the node-based image generation framework making waves in the AI art scene, saw its development team, Comfy Org, host its first-ever meetup in Shibuya, Tokyo on September 27, 2024.
The event drew a crowd of 37 enthusiastic attendees, including ComfyUI users, developers, and AI art enthusiasts. The night was filled with excitement as they delved into the latest updates, future prospects, and innovative applications of ComfyUI.
Presentations by the Development Team: Unveiling New Features, Models, and the Future of ComfyUI
The evening commenced with an opening address by Yoland, the leader of Comfy Org, who warmly introduced the team and shared their passion for ComfyUI.
Next, HCL and Robin took the stage to unveil upcoming features for the beta version of Electron, the frontend, and Electron itself, generating a wave of anticipation and excitement among the attendees.
ComfyAnoymous then presented insights into new models, followed by kosinkadink, who shed light on advancements in ADE and model patching. These presentations provided a valuable glimpse into the ongoing evolution of ComfyUI.
Engaging Q&A Session: Deep Dive into ComfyUI and the Future of AI Image Generation
Following the presentations, attendees had the opportunity to engage in a Q&A session with the development team. The discussion was lively, covering topics ranging from practical aspects of using ComfyUI to broader questions about the future of AI image generation.
Lightning Talks & Workflow Sharing: Fostering Connections and Collaboration
The latter half of the event was dedicated to lightning talks (LTs) and workflow sharing by ComfyUI users.
The face seals were applied by the editor-in-chief of AICU media (human processed).
With a diverse range of topics related to ComfyUI, attendees showcased their creative applications and unique workflows. This segment fostered a valuable learning environment where participants shared knowledge, experiences, and inspiration.
★ Call for Contributions: We at AICU media encourage speakers who shared their insights at the meetup to consider contributing their presentations to our platform. We offer compensation for published articles.
Networking and After-Party: Building the ComfyUI Community
The evening concluded with a networking session and an after-party, providing ample opportunities for attendees to connect and mingle.
The shared passion for ComfyUI sparked lively conversations and fostered new connections within the growing community.
This inaugural meetup served as a testament to the vibrant ComfyUI community and the high expectations surrounding the future of AI image generation. As ComfyUI continues to evolve, it promises to unlock new creative possibilities for artists and developers alike.
ポジティブプロンプト: “1boy, solo, young man with afro, male k-pop idol, lovingly looking camera, medium portrait soft light, chop, beautiful model, oval face, vivid”
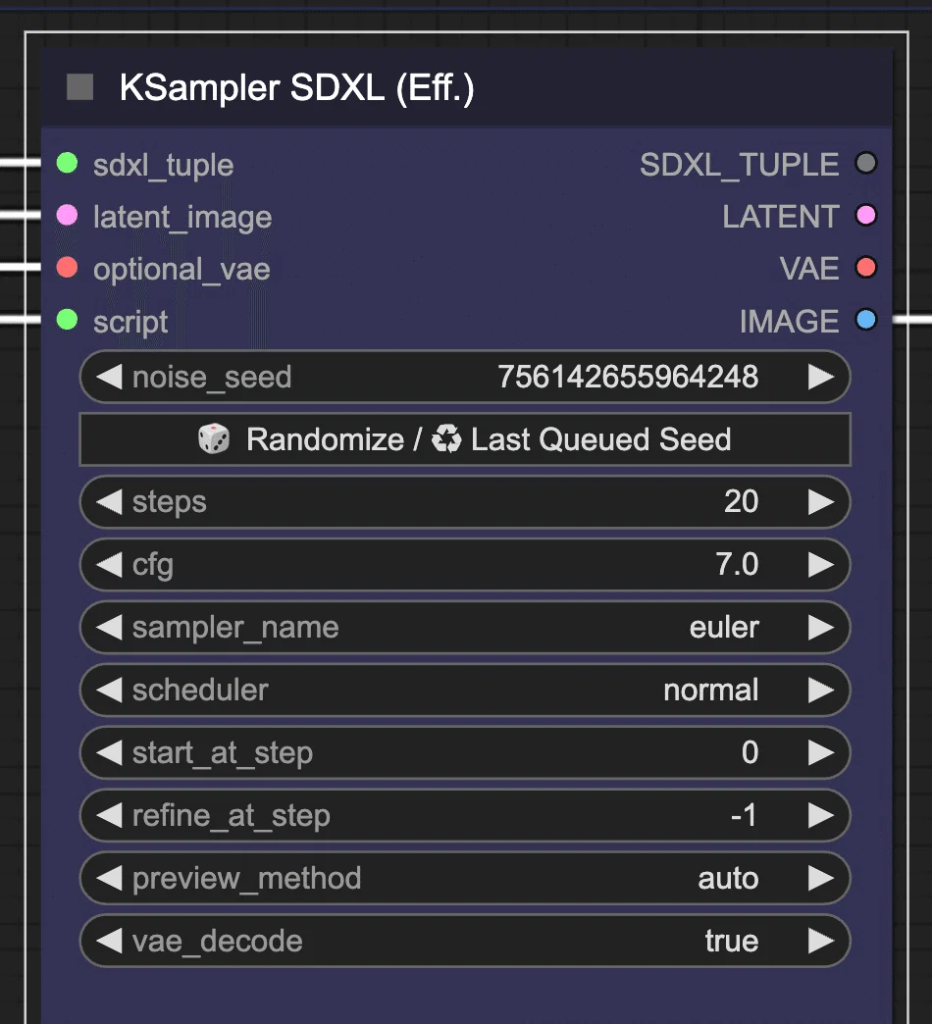
今回は、「Efficiency Nodes for ComfyUI」というカスタムノードを使用します。「Efficiency Nodes for ComfyUI」は、ComfyUIのワークフローを効率化し、ノードの総数を減らすために開発されたカスタムノードのコレクションです。これにより、画像生成や編集プロセスがよりシンプルかつ効果的になります。
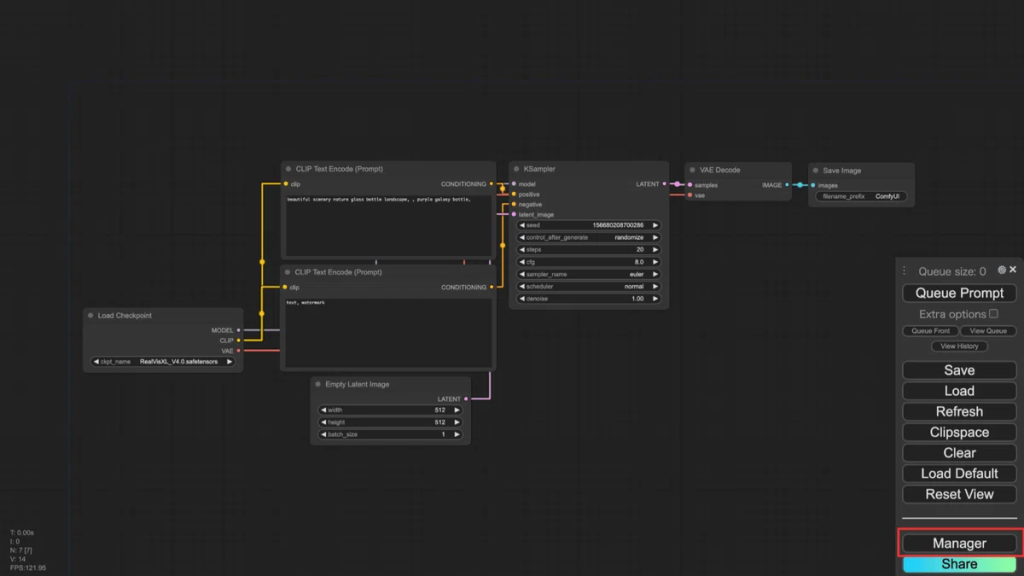
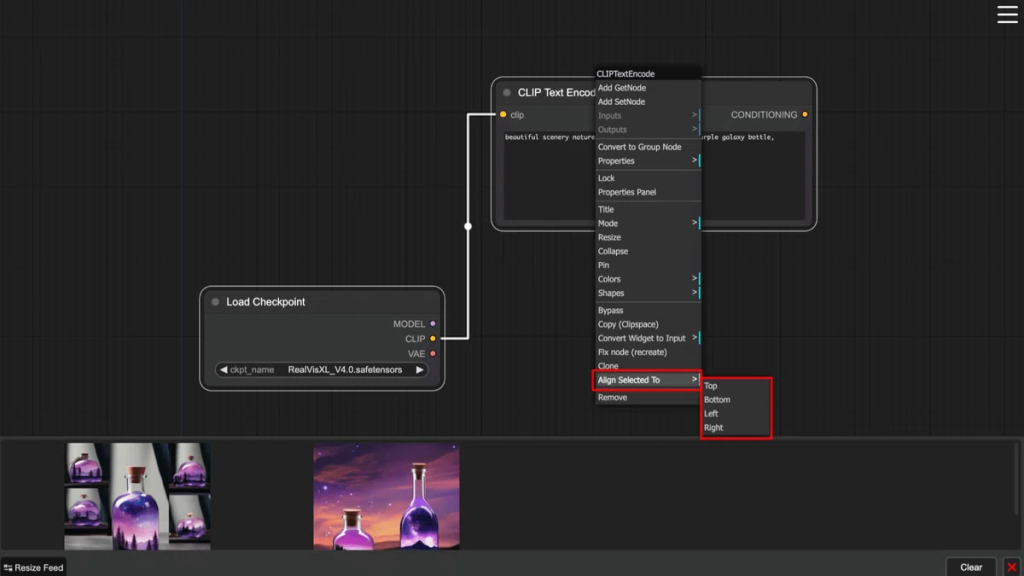
「Save」のプルダウンメニューを開くと、「Save as」と「Save to workflows」が表示されます。「Save as」は、標準の保存機能で、指定した場所にワークフローが保存されます。「Save to workflows」は、保存場所の指定はできず、自動で「ComfyUI/pysssss-workflows」フォルダに指定した名前でワークフローが保存されます。
次に「Load」のプルダウンメニューを開きます。このメニューには、「ComfyUI/pysssss-workflows」フォルダに保存されているワークフローが表示されます(要するに「Save to workflows」で保存したワークフローが表示されるということ)。通常の「Load」では、ファイル選択ダイアログが開き、読み込むワークフローを選択しますが、この機能ではプルダウンメニューに表示されたワークフローをクリックするだけで読み込むことができます。
次に「Load Image」ノードを追加し、「choose file to upload」から対象の画像をアップロードします。
次に空白をダブルクリックして「Pad Image for Outpainting」を追加し、「Load Image」の出力「IMAGE」と、「Pad Image for Outpainting」の入力「image」を接続します。
「Pad Image for Outpainting」では、left、top、right、bottomにピクセル単位で拡張するサイズを指定できます。また、feathering(フェザリング)は、画像の端をぼかして滑らかに周囲と馴染ませる技術です。outpaintingでは、元の画像と新しく生成した部分の境界をなめらかにつなぐために使用されます。今回は、topに200px、featheringに100pxを指定しました。